参考狂神视频:【狂神说Java】Docker最新超详细版教程通俗易懂
Docker命令 1 2 3 docker version docker info #显示docker的系统信息 docker 命令 --help
镜像命令 官网: https://hub.docker.com/
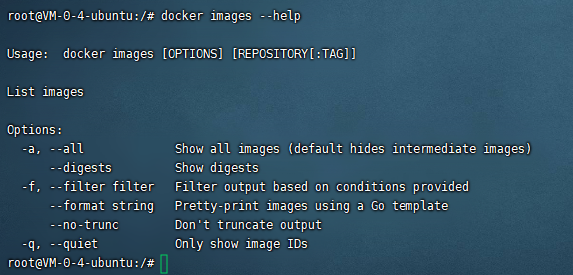
docker images
1 2 3 4 5 repository 存储库 镜像的仓库源 TAG 镜像的标签 IMAGE ID 镜像的ID CREATED 镜像的创建时间 SIZE 大小
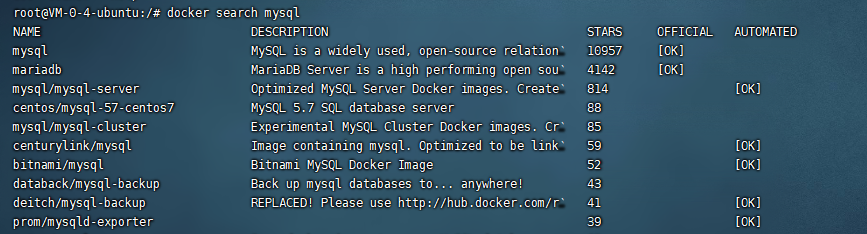
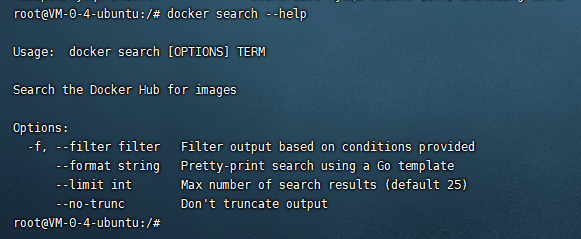
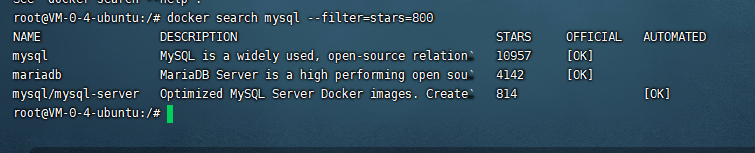
docker serch
不截断输出
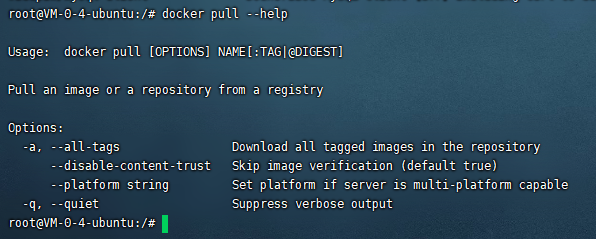
docker pull
1 2 3 4 5 6 7 8 9 10 11 12 13 14 15 16 17 18 19 20 21 # 下载镜像 docker pull 镜像名[:tag] # 如果不加tag,则默认下载latest root@VM-0-4-ubuntu:/# docker pull php Using default tag: latest #分层下载 docker images的核心 联合文件系统 latest: Pulling from library/php 69692152171a: Already exists #分层共用 2040822db325: Pull complete 9b4ca5ae9dfa: Pull complete ac1fe7c6d966: Pull complete 7994240c01ee: Pull complete 17d30fab02f4: Pull complete 0e0d506afaf7: Pull complete dd2edbf3c029: Pull complete 195ee400b641: Pull complete Digest: sha256:e1ee5a85f9c0f00258559ed806e113dc6f6721ff7d6e6ce35229ebe986aa84c6 #签名 Status: Downloaded newer image for php:latest docker.io/library/php:latest #真实地址 # docker pull php docker.io/library/php 这两个命令等价
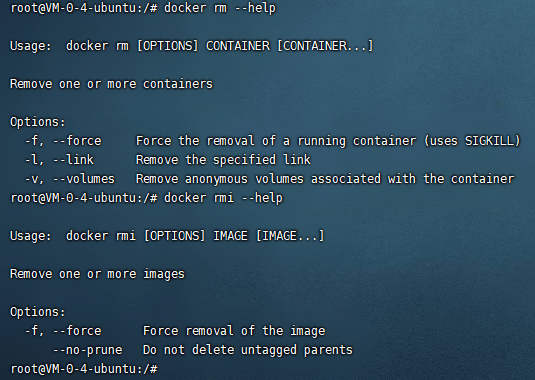
docker rmi 删除镜像
删除所以的镜像
1 docker rmi -f $(docker images -aq)
docker rm 删除容器
容器命令 docker run
1 2 3 4 5 6 7 8 9 10 11 12 13 14 15 16 17 18 19 20 21 22 23 docker run [可选参数] image # 参数说明 --name=“Name” 容器名称 Tomcat01 Tomcat02,用来区分容器 -d 后台方式允许 # Run container in background and print container ID -it 使用交互方式运行,进入容器查看内容 -p 指定容器端口 -p 8080:8080 -p ip:主机端口:容器端口 -p 主机端口:容器端口 -p 容器端口 容器端口 -P 随机指定端口 -v 挂载 docker run -it centos(镜像名,镜像id) /bin/bash #/bin/bash容器运行的控制台 启动并进入容器 # exit 退出容器 # ctrl+P+Q 容器不停止退出 docker run -d centos /bin/sh -c "while i<10;do echo zoey;i++;sleep 1 done"
1 2 docker run -it --rm tomcat:9.0 # --rm 不写--rm停止了容器之后,容器还是可以查到,加上--rm,一般用来测试,用完就删除。
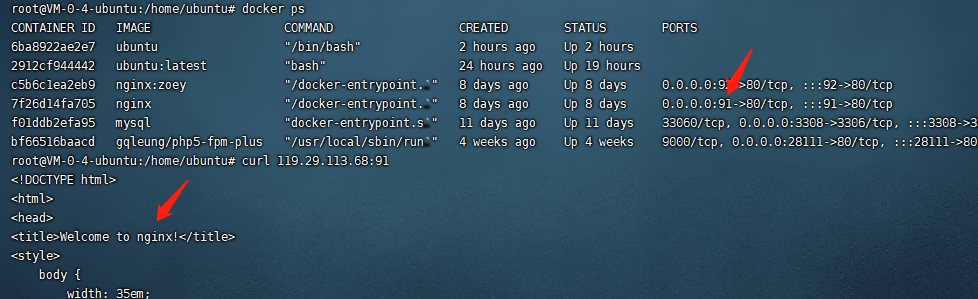
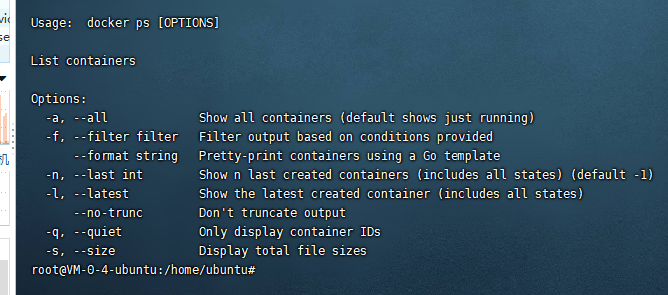
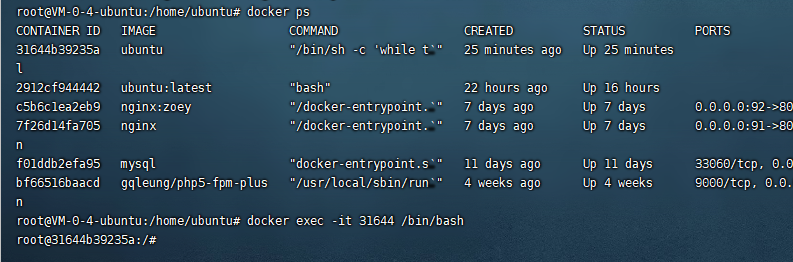
docker ps
1 2 3 4 5 docker ps #列出当前正在运行的容器 docker ps -a #列出所以的容器 docker ps -n=3 #显示最近创建的3个容器 docker ps -q #只显示容器的编号 docker ps -aq
docker rm
1 2 docker rm 容器id #删除指定的容器,不能删除正在运行的容器,强制删除,-f docker rm -f $(docker ps -aq) #删除所有的容器
启动和停止容器操作
1 2 3 4 docker start 容器id docker restart #重启命令 docker stop 容器id docker kill 容器id
后台启动容器
1 2 3 docker run -d 镜像名 # 问题docker ps,发现容器停止了,docker容器使用后台运行,就必须要有一个前台进程,docker发现没有应用,就会自动停止
docker logs
docker logs -f -t –tail 10 容器id
docker inspect 容器id
1 2 3 4 5 6 7 8 9 10 11 12 13 14 15 16 17 18 19 20 21 22 23 24 25 root@VM-0-4-ubuntu:/home/ubuntu# docker inspect 31644 [ { "Id": "31644b39235af33e8a4bad8c5ffeda7de182ac15d54170dc52e54c444140f101", "Created": "2021-06-06T03:12:51.164542086Z", "Path": "/bin/sh", "Args": [ "-c", "while true;do echo zoey;sleep 1; done" ], "State": { "Status": "running", "Running": true, "Paused": false, "Restarting": false, "OOMKilled": false, "Dead": false, "Pid": 26299, "ExitCode": 0, "Error": "", "StartedAt": "2021-06-06T03:12:51.71806252Z", "FinishedAt": "0001-01-01T00:00:00Z" }, "Image": "sha256:7e0aa2d69a153215c790488ed1fcec162015e973e49962d438e18249d16fa9bd",
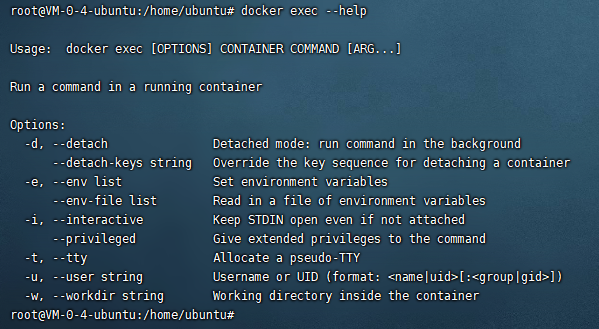
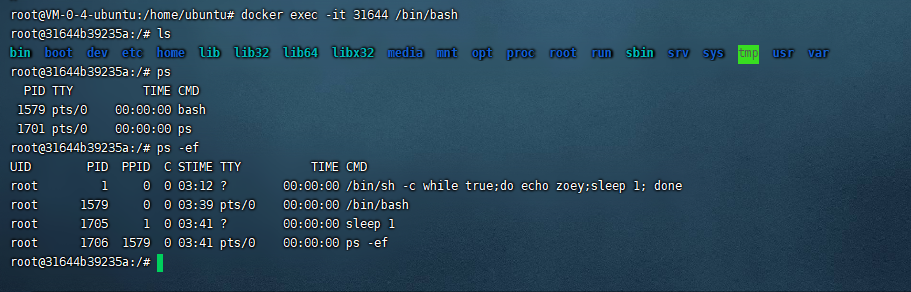
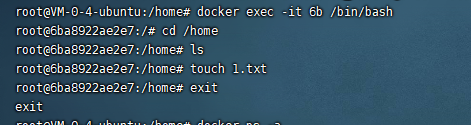
docker exec
进入容器后开启一个新的终端,可以在里面操作(常用)
1 docker exec -it 容器id 控制台
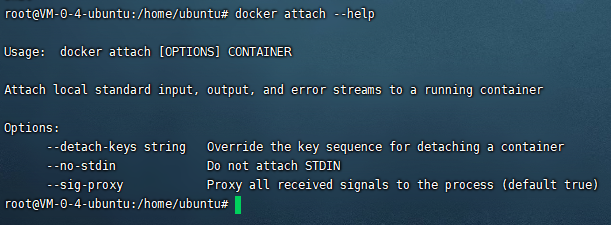
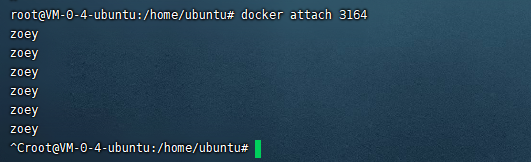
docker attach
进入容器正在执行的终端
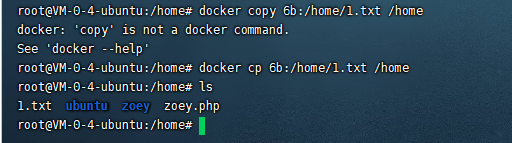
docker cp
从容器内拷贝文件到主机上
docker cp 容器id:容器内路径 目的的主机路径
可视化 portainer
1
2
docker run -d -p 8088:9000 --restart=always -v /var/run/docker.sock:/var/run/docker.sock --privileged=true portainer/portainer
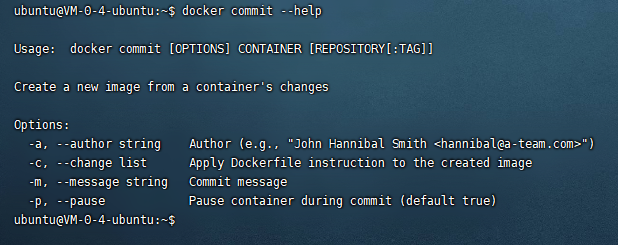
Docker镜像 commit镜像
docker commit
1 2 3 docker commit 提交容器成为一个新的副本 docker commit -m="提交的描述信息" -a="作者" 容器id 目标镜像名:[tag] docker commit -a="zoey" -m="add /usr/1.txt" 6ba ubuntu:zoey
1 2 3 4 5 6 7 8 9 10 11 12 13 14 15 16 17 18 19 20 21 22 23 24 25 26 27 28 29 30 root@VM-0-4-ubuntu:/home/ubuntu# docker ps CONTAINER ID IMAGE COMMAND CREATED STATUS PORTS NAMES 6ba8922ae2e7 ubuntu "/bin/bash" 5 hours ago Up 5 hours silly_galois root@VM-0-4-ubuntu:/home/ubuntu# docker exec -it 6b /bin/bash root@6ba8922ae2e7:/# ls bin boot dev etc home lib lib32 lib64 libx32 media mnt opt proc root run sbin srv sys tmp usr var root@6ba8922ae2e7:/# cd home root@6ba8922ae2e7:/home# ls 1.txt root@6ba8922ae2e7:/home# cp 1.txt/* -r /usr cp: cannot stat '1.txt/*': Not a directory root@6ba8922ae2e7:/home# cp 1.txt -r /usr root@6ba8922ae2e7:/home# cd ../ root@6ba8922ae2e7:/# cd usr root@6ba8922ae2e7:/usr# ls 1.txt bin games include lib lib32 lib64 libx32 local sbin share src root@VM-0-4-ubuntu:/home/ubuntu# docker commit -a="zoey" -m="add /usr/1.txt" 6ba ubuntu:zoey sha256:b7edf11897bf2c0146887ba7fbc4d097d4e5ed70f156d0589ec4d4034833774a root@VM-0-4-ubuntu:/home/ubuntu# docker images REPOSITORY TAG IMAGE ID CREATED SIZE ubuntu zoey b7edf11897bf 17 seconds ago 72.7MB ubuntu latest 7e0aa2d69a15 6 weeks ago 72.7MB root@VM-0-4-ubuntu:/home/ubuntu#
容器数据卷
容器的持久化和同步操作!容器间也是可以数据共享的!
1
2
docker run -it -v 主机目录,容器内目录 docker run -it -v /home/ceshi:/home ubuntu /bin/bash
1 2 3 4 5 6 7 8 9 10 11 12 13 14 15 16 17 18 19 20 21 root@VM-0-4-ubuntu:/home# docker inspect ff [ { "Id": "ffcb8b83d784222aa565355f0d279a96372dbf85f5668cbbde91d73aabc9b11e", "Created": "2021-06-06T09:05:06.801684741Z", "Mounts": [ #挂载 { "Type": "bind", "Source": "/home/ceshi", #主机内地址 "Destination": "/home", #容器内地址 "Mode": "", "RW": true, "Propagation": "rprivate" } ], root@VM-0-4-ubuntu:/home#
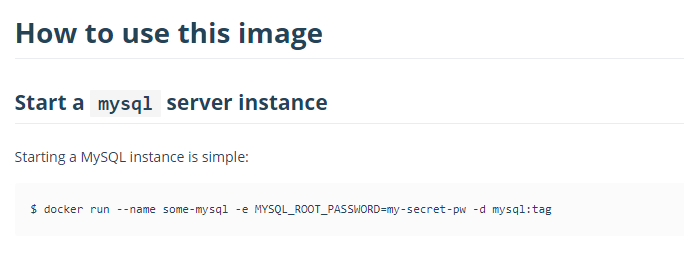
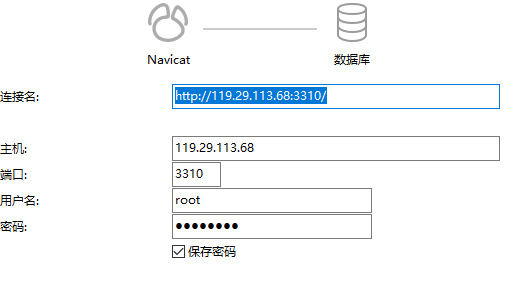
安装mysql
1 2 3 4 5 6 7 8 9 10 docker run -d -p 3310:3306 -v /home/mysql/conf:/etc/mysql/conf.d -v /home/mysql/data:/var/lib/mysql -e MYSQL_ROOT_PASSWORD=zoey --name mysql-zoey mysql # -d 后台运行 -p 端口映射 -v 卷挂载 -e 环境配置 --name 容器名字
假设删除docker,我们挂载到本地的数据卷依旧没有丢失,实现了容器数据持久化。
具名和匿名挂载 1 2 3 # 匿名挂载 -v 容器内路径 docker run -d -P --name nginx01 -v /etx/nginx nginx
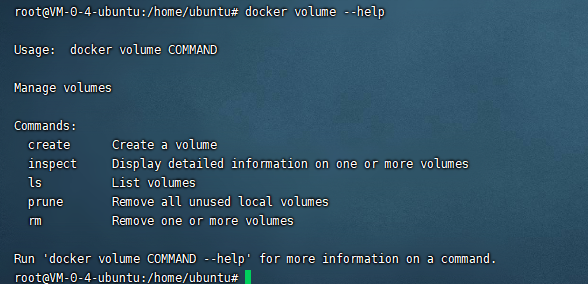
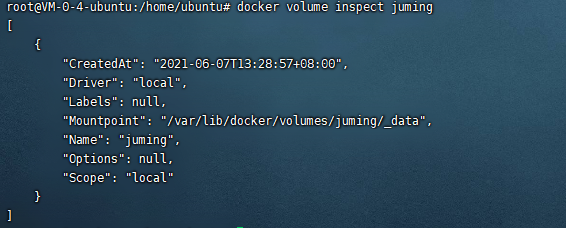
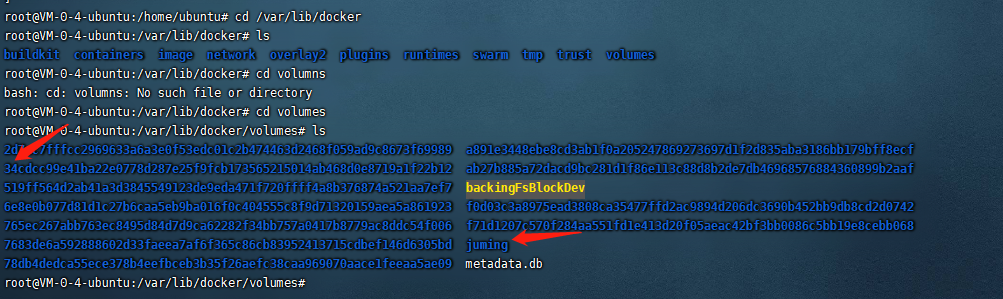
docker volume
1 2 3 4 5 6 7 8 9 10 11 12 13 14 15 16 17 18 19 20 21 22 23 24 root@VM-0-4-ubuntu:/home/ubuntu# docker run -d -P --name nginx01 -v /etx/nginx nginx 602eaa287d4f15079561477ca3ef8f7231c1193b45830b3e6f2948af3fe84533 root@VM-0-4-ubuntu:/home/ubuntu# docker inspect 602 [ "Mounts": [ { "Type": "volume", "Name": "34cdcc99e41ba22e0778d287e25f9fcb173565215014ab468d0e8719a1f22b12", "Source": "/var/lib/docker/volumes/34cdcc99e41ba22e0778d287e25f9fcb173565215014ab468d0e8719a1f22b12/_data", "Destination": "/etx/nginx", "Driver": "local", "Mode": "", "RW": true, "Propagation": "" } ], root@VM-0-4-ubuntu:/home/ubuntu#
所以docker容器内的卷,没有指定目录的情况下都是在 /var/lib/docker/volumes/xxxxxxxxx/_data
1 2 3 4 # 如何确定是具名挂载还是匿名挂载,还是指定路径挂载 -v 容器内路径 #匿名挂载 -V 卷名:容器内路径 #具名挂载 -v /宿主机路径::容器内路径 #指定路径挂载
拓展:
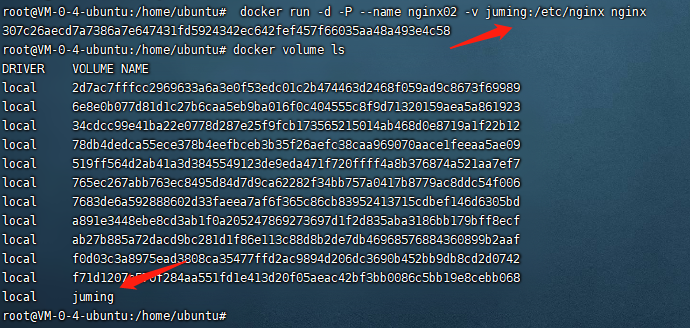
1 2 3 4 5 6 7 8 9 10 # 通过 -v 容器内路径:ro rw 改变读写权限 ro readonly #只读 rw readwrite #可读可写 docker run -d -P --name nginx02 -v juming:/etc/nginx:ro nginx docker run -d -P --name nginx02 -v juming:/etc/nginx:rw nginx # ro 只要看到ro就说明这个路径只能通过宿主机来操作,容器内部无法操作!
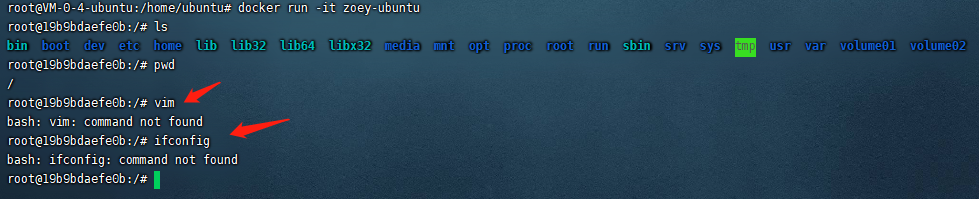
初识dockerfile 1 2 3 4 5 6 # 创建一个dockerfile文件,名字可以随机,建议dockerfile FROM ubuntu VOLUME ["volume01","volume02"] #匿名挂载 CMD echo "---end----" CMD /bin/bash
1 2 3 4 5 6 7 8 9 10 11 12 13 14 15 16 17 18 19 20 21 22 23 24 25 root@VM-0-4-ubuntu:/home/docker-test-volume# docker build -f dockerfile2 -t zoey-ubuntu . Sending build context to Docker daemon 2.048kB Step 1/4 : FROM ubuntu ---> 7e0aa2d69a15 Step 2/4 : VOLUME ["volume01","volume02"] ---> Running in 1b8f3e830fe7 Removing intermediate container 1b8f3e830fe7 ---> 3b606b6c25b7 Step 3/4 : CMD echo "---end----" ---> Running in c9074ee3f429 Removing intermediate container c9074ee3f429 ---> 1500f859cd83 Step 4/4 : CMD /bin/bash ---> Running in 8097d32115de Removing intermediate container 8097d32115de ---> 7951065fe479 Successfully built 7951065fe479 Successfully tagged zoey-ubuntu:latest root@VM-0-4-ubuntu:/home/docker-test-volume# root@VM-0-4-ubuntu:/home/ubuntu# docker images REPOSITORY TAG IMAGE ID CREATED SIZE zoey-ubuntu latest 7951065fe479 6 minutes ago 72.7MB ubuntu zoey b7edf11897bf 27 hours ago 72.7MB
1 2 3 4 5 6 7 8 9 10 11 12 13 14 15 16 17 18 19 20 21 22 root@VM-0-4-ubuntu:/home/ubuntu# docker inspect 795 #查看镜像的信息 [ { "Id": "sha256:7951065fe479122a0f86001b30685e09fba729949f86be41043c396e75c6b269", "RepoTags": [ "zoey-ubuntu:latest" ], "Cmd": [ "/bin/sh", "-c", "#(nop) ", "CMD [\"/bin/sh\" \"-c\" \"/bin/bash\"]" ], "Image": "sha256:1500f859cd836453c9ca631adde5491b2be840c3a7a27c3248da1c8e79b9709f", "Volumes": { "volume01": {}, "volume02": {} }, root@VM-0-4-ubuntu:/home/ubuntu#
1 2 3 4 5 6 7 8 9 10 11 12 13 14 15 16 17 18 19 20 21 22 23 24 25 26 27 28 29 30 31 32 33 34 35 36 37 38 39 40 41 42 43 44 45 46 47 48 49 50 51 52 53 54 55 56 57 58 59 60 61 62 root@VM-0-4-ubuntu:/home/ubuntu# docker run -it 795 /bin/bash root@9d9a92697fe2:/# ls -l total 56 lrwxrwxrwx 1 root root 7 Apr 16 05:11 bin -> usr/bin drwxr-xr-x 2 root root 4096 Apr 15 2020 boot drwxr-xr-x 5 root root 360 Jun 7 11:59 dev ... drwxr-xr-x 2 root root 4096 Jun 7 11:59 volume01 #生成镜像时自己挂载的目录,也就是数据卷目录,这个卷与外部一定有一个同步的目录 drwxr-xr-x 2 root root 4096 Jun 7 11:59 volume02 root@9d9a92697fe2:/# root@eb3c672d39cc:/# touch contain.txt root@eb3c672d39cc:/# root@VM-0-4-ubuntu:/home/ubuntu# docker ps CONTAINER ID IMAGE COMMAND CREATED STATUS PORTS NAMES eb3c672d39cc 795 "/bin/bash" About a minute ago Up About a minute ecstatic_hermann root@VM-0-4-ubuntu:/home/ubuntu# docker inspect eb3 [ { "Mounts": [ { "Type": "volume", "Name": "18cc4a63abde73a0bcd9718e5be7ff98108dfd1a34b9f2ffd7332df987fb9ab4", "Source": "/var/lib/docker/volumes/18cc4a63abde73a0bcd9718e5be7ff98108dfd1a34b9f2ffd7332df987fb9ab4/_data", "Destination": "volume01", "Driver": "local", "Mode": "", "RW": true, "Propagation": "" }, { "Type": "volume", "Name": "2b945dc600d76a06580f0ff77752ad7f70fa023e7121f7051a20a1ddb062361e", "Source": "/var/lib/docker/volumes/2b945dc600d76a06580f0ff77752ad7f70fa023e7121f7051a20a1ddb062361e/_data", "Destination": "volume02", "Driver": "local", "Mode": "", "RW": true, "Propagation": "" } ], ] root@VM-0-4-ubuntu:/home/ubuntu# root@VM-0-4-ubuntu:/var/lib/docker/volumes/18cc4a63abde73a0bcd9718e5be7ff98108dfd1a34b9f2ffd7332df987fb9ab4/_data# docker exec -it eb /bin/bash root@eb3c672d39cc:/# ls bin boot contain.txt dev etc home lib lib32 lib64 libx32 media mnt opt proc root run sbin srv sys tmp usr var volume01 volume02 root@eb3c672d39cc:/# cd volume01 root@eb3c672d39cc:/volume01# ls root@eb3c672d39cc:/volume01# mkdir text root@VM-0-4-ubuntu:/var/lib/docker/volumes/18cc4a63abde73a0bcd9718e5be7ff98108dfd1a34b9f2ffd7332df987fb9ab4/_data# cd ../ root@VM-0-4-ubuntu:/var/lib/docker/volumes/18cc4a63abde73a0bcd9718e5be7ff98108dfd1a34b9f2ffd7332df987fb9ab4/_data# ls text
数据卷容器 多个mysql同步数据!–volumes-from
1 2 3 4 5 6 7 8 9 10 root@VM-0-4-ubuntu:/home/ubuntu# docker run -it --name ubuntu01 zoey-ubuntu root@4825d12bcbfd:/# ls bin boot dev etc home lib lib32 lib64 libx32 media mnt opt proc root run sbin srv sys tmp usr var volume01 volume02 root@4825d12bcbfd:/# root@VM-0-4-ubuntu:/home/ubuntu# docker run -it --name ubuntu02 --volumes-from ubuntu01 zoey-ubuntu root@0642646b93f1:/# ls bin boot dev etc home lib lib32 lib64 libx32 media mnt opt proc root run sbin srv sys tmp usr var volume01 volume02 root@0642646b93f1:/#
测试,删除ubuntu01这个容器,ubuntu02仍然存在。
1 2 3 4 5 6 7 8 9 10 11 12 13 14 15 16 17 ubuntu@VM-0-4-ubuntu:~$ sudo su root@VM-0-4-ubuntu:/home/ubuntu# docker ps CONTAINER ID IMAGE COMMAND CREATED STATUS PORTS NAMES 0642646b93f1 zoey-ubuntu "/bin/sh -c /bin/bash" 7 minutes ago Up 7 minutes ubuntu02 4825d12bcbfd zoey-ubuntu "/bin/sh -c /bin/bash" 13 minutes ago Up 13 minutes ubuntu01 root@VM-0-4-ubuntu:/home/ubuntu# docker rm -f ubuntu01 ubuntu01 root@VM-0-4-ubuntu:/home/ubuntu# docker ps CONTAINER ID IMAGE COMMAND CREATED STATUS PORTS NAMES 0642646b93f1 zoey-ubuntu "/bin/sh -c /bin/bash" 8 minutes ago Up 8 minutes ubuntu02 root@VM-0-4-ubuntu:/home/ubuntu# docker attach 06 root@0642646b93f1:/volume01# ls test.php root@0642646b93f1:/volume01#
Dockerfile commit镜像
构建步骤: 1,编写一个dockerfile文件
2,docker build 构建成为一个镜像
3,docker run 运行镜像
4,docker push 发布镜像
基础知识 1,每个保留关键字(指令)都是必须是大写字母
2,执行从上到下顺序执行
3,#表示注释
4,每一个指令都会创建提交一个新的镜像层,并提交!
5,Dockerfile:构建文件,定义了一切的步骤,源代码
6,Dockerimages:通过DockerFile 构建生成的镜像,最终发布和运行的产品
7,Docker容器:容器就是运行起来通过服务器
Build
both
run
from
workdir
cmd
maintainer
user
env
copy
expose
add
volume
run
entrypoint
onbuild
.dockerignore
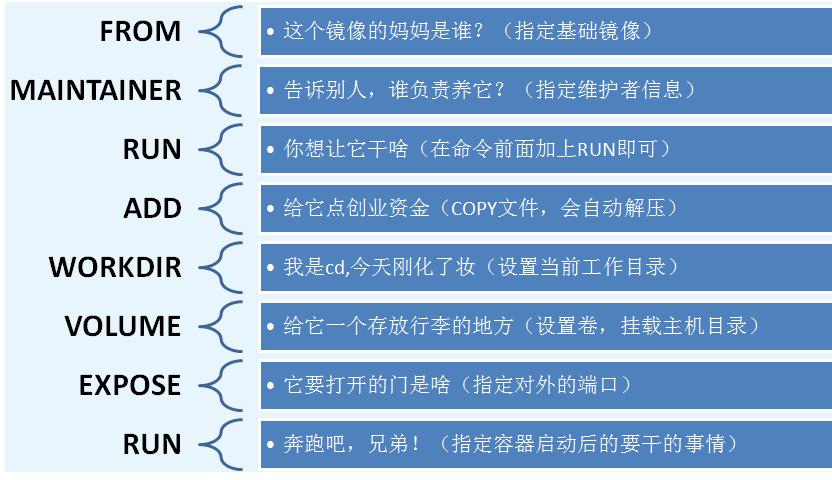
1 2 3 4 5 6 7 8 9 10 11 12 13 FROM #基础镜像 MAINTANER #镜像是谁写的,姓名+邮箱 RUN #镜像构建的时候需要运行的命令 ADD #步骤,添加镜像 WORKDIR #镜像的工作目录 VOLUME #挂载的目录 EXPOSE #暴露端口 CMD #指定容器启动时要运行的命令,只有最后一个会生效,可被替代 ENTRYPOINT #指定容器启动时要运行的命令,可以追加命令 ONBUILD #当构建一个被继承DockerFile,这个时候就会运行ONBUILD的指令。触发指令 COPY #类时ADD,将我们文件拷贝到镜像中 ENV #构建的时候设置环境变量
创建一个自己的ubuntu 1 2 3 4 5 6 7 8 9 10 11 12 13 14 FROM ubuntuMAINTAINER zoey<2793988587 @qq.com>ENV MYPATH /usr/localWORKDIR $MYPATH EXPOSE 80 CMD echo $MYPATH CMD echo "-----end--------" CMD /bin/bash
1 2 3 4 5 6 7 8 9 10 11 12 13 14 15 16 17 18 19 20 21 22 23 24 25 26 27 28 29 30 31 32 33 34 # docker build -f dockerfile文件路径 -t 镜像名 . root@VM-0-4-ubuntu:/home/dockerfile# docker build -f ubuntu-dockerfile -t myubuntu . Sending build context to Docker daemon 2.048kB Step 1/8 : FROM ubuntu ---> 7e0aa2d69a15 Step 2/8 : MAINTAINER zoey<2793988587@qq.com> ---> Using cache ---> 855dd74aacd1 Step 3/8 : ENV MYPATH /usr/local ---> Using cache ---> caa62b563ec6 Step 4/8 : WORKDIR $MYPATH ---> Using cache ---> 565b392c108e Step 5/8 : EXPOSE 80 ---> Running in 10361ac00b43 Removing intermediate container 10361ac00b43 ---> 29922dc8ab10 Step 6/8 : CMD echo $MYPATH ---> Running in 1d44164bcbcf Removing intermediate container 1d44164bcbcf ---> 1359d2d48b51 Step 7/8 : CMD echo "-----end--------" ---> Running in f0388b762746 Removing intermediate container f0388b762746 ---> 525b18cf8195 Step 8/8 : CMD /bin/bash ---> Running in 64d841618447 Removing intermediate container 64d841618447 ---> 1e862dd787d8 Successfully built 1e862dd787d8 Successfully tagged myubuntu:latest
1 2 3 4 5 6 7 8 9 10 11 root@VM-0-4-ubuntu:/home/dockerfile# docker images REPOSITORY TAG IMAGE ID CREATED SIZE myubuntu latest 1e862dd787d8 About a minute ago 72.7MB ... ubuntu latest 7e0aa2d69a15 6 weeks ago 72.7MB root@VM-0-4-ubuntu:/home/dockerfile# docker run -it myubuntu root@b6b73497438f:/usr/local# pwd /usr/local root@b6b73497438f:/usr/local#
CMD 和 ENTRYPOINT 1 2 CMD #指定这个容器启动的时候要运行的命令,只有最后一个会生效,可被替代 ENTRYPOINT #指定这个容器启动的时候要运行的命令,可以追加命令
1 2 3 4 5 6 7 8 9 10 11 12 13 14 15 16 17 18 19 20 21 22 23 24 25 26 27 28 29 30 31 32 33 34 35 36 37 38 39 40 41 42 43 44 45 46 47 48 49 50 51 52 53 54 55 56 57 58 59 60 61 62 63 64 # cmd-dockerfile FROM ubuntu CMD ["ls","-a"] ubuntu@VM-0-4-ubuntu:~$ cd /home/dockerfile/ ubuntu@VM-0-4-ubuntu:/home/dockerfile$ ls cmd-dockerfile ubuntu-dockerfile ubuntu@VM-0-4-ubuntu:/home/dockerfile$ sudo su root@VM-0-4-ubuntu:/home/dockerfile# docker build -f cmd-dockerfile -t cmdtest . Sending build context to Docker daemon 3.072kB Step 1/2 : FROM ubuntu ---> 7e0aa2d69a15 Step 2/2 : CMD ["ls","-a"] ---> Running in 7a88f7671d54 Removing intermediate container 7a88f7671d54 ---> 318e4672c318 Successfully built 318e4672c318 Successfully tagged cmdtest:latest root@VM-0-4-ubuntu:/home/dockerfile# docker run 318 . .. .dockerenv bin boot dev etc home lib lib32 lib64 libx32 media mnt opt proc root run sbin srv sys tmp usr var root@VM-0-4-ubuntu:/home/dockerfile# # 想追加一个命令 -l # ls -al root@VM-0-4-ubuntu:/home/dockerfile# docker run 318 -l docker: Error response from daemon: OCI runtime create failed: container_linux.go:367: starting container process caused: exec: "-l": executable file not found in $PATH: unknown. # cmd的清理下 -l替换CMD["ls" ,"-a" ]命令,-l不是命令所以报错 root@VM-0-4-ubuntu:/home/dockerfile# docker run 318 ls -al total 56 drwxr-xr-x 1 root root 4096 Jun 8 05:05 . drwxr-xr-x 1 root root 4096 Jun 8 05:05 .. ... drwxr-xr-x 1 root root 4096 Apr 16 05:11 usr drwxr-xr-x 1 root root 4096 Apr 16 05:32 var root@VM-0-4-ubuntu:/home/dockerfile#
1 2 3 4 5 6 7 8 9 10 11 12 13 14 15 16 17 18 19 20 21 22 23 24 25 26 27 28 29 30 31 32 33 34 35 36 37 38 39 40 41 42 43 # entrypoint-dockerfile.txt FROM ubuntu ENTRYPOINT ["ls","-a"] root@VM-0-4-ubuntu:/home/dockerfile# ls cmd-dockerfile entrypoint-dockerfile.txt ubuntu-dockerfile root@VM-0-4-ubuntu:/home/dockerfile# docker build -f entrypoint-dockerfile.txt -t entrypoint . Sending build context to Docker daemon 4.096kB Step 1/2 : FROM ubuntu ---> 7e0aa2d69a15 Step 2/2 : ENTRYPOINT ["ls","-a"] ---> Running in 2a1c4342aea3 Removing intermediate container 2a1c4342aea3 ---> 6c980aa1f3b7 Successfully built 6c980aa1f3b7 Successfully tagged entrypoint:latest root@VM-0-4-ubuntu:/home/dockerfile# docker run 6c98 . .. .dockerenv bin boot dev etc ... tmp usr var root@VM-0-4-ubuntu:/home/dockerfile# docker run 6c98 -l total 56 drwxr-xr-x 1 root root 4096 Jun 8 05:10 . drwxr-xr-x 1 root root 4096 Jun 8 05:10 .. -rwxr-xr-x 1 root root 0 Jun 8 05:10 .dockerenv lrwxrwxrwx 1 root root 7 Apr 16 05:11 bin -> usr/bin drwxr-xr-x 2 root root 4096 Apr 15 2020 boot ... drwxr-xr-x 1 root root 4096 Apr 16 05:32 var root@VM-0-4-ubuntu:/home/dockerfile# root@VM-0-4-ubuntu:/home/dockerfile# docker run 6c98 ls -al ls: cannot access 'ls': No such file or directory root@VM-0-4-ubuntu:/home/dockerfile#
tomcat镜像 1,准备镜像文件,tomcat压缩包,jdk压缩包。
2,编写dockerfile文件,官方命名为Dockerfile
1 2 3 4 5 6 7 8 9 10 11 12 13 14 15 16 17 18 19 20 21 22 23 FROM centosMAINTAINER zoey<2793988587 @qq.com>ADD jdk-16.0.1_linux-x64_bin.tar.gz /usr/local / ADD apache-tomcat-9.0.46.tar.gz /usr/local / RUN yum -y install vim ENV MYPATH /usr/localWORKDIR $MYPATH ENV JAVA_HOME /usr/local/jdk-16.0 .1 ENV CLASSPATH $JAVA_HOME/lib/dt.jar:$JAVA_HOME/lib/tools.jarENV CATALINA_HOME /usr/local/apache-tomcat-9.0 .46 ENV CATALINA_BASH /usr/local/apache-tomcat-9.0 .46 ENV PATH $PATH:$JAVA_HOME/bin:$CATALINA_HOME/lib:$CATALINA_HOME/binEXPOSE 8080 CMD /usr/local /apache-tomcat-9.0.46/bin/startup.sh && tail -F /usr/local /apache-tomcat-9.0.46/bin/logs/catalina.out
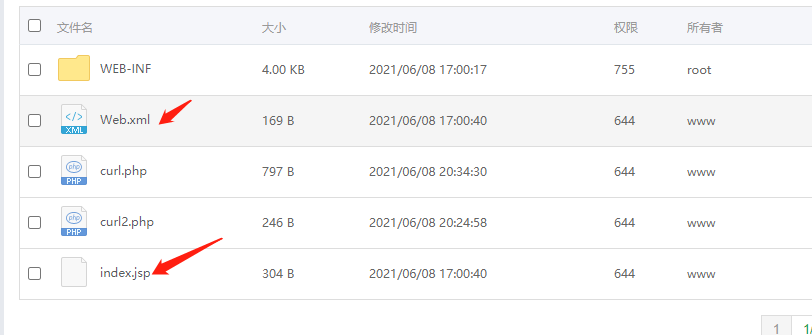
1 2 3 4 5 6 7 8 9 10 11 12 13 14 15 16 17 18 19 20 21 22 23 24 25 26 27 28 29 30 31 32 33 34 35 36 37 38 39 40 41 42 43 44 45 46 47 48 49 50 51 52 53 54 55 56 57 58 59 60 61 62 63 64 65 66 67 68 69 70 71 72 73 74 75 76 77 78 79 80 81 82 83 84 85 86 87 88 89 90 91 92 93 94 95 96 97 98 99 100 101 102 103 104 105 106 107 108 109 110 111 112 113 114 115 116 117 118 119 120 121 122 123 124 125 126 127 128 129 130 131 132 133 ubuntu@VM-0-4-ubuntu:~$ cd /www/wwwroot/ ubuntu@VM-0-4-ubuntu:/www/wwwroot$ cd 119.29.113.68/ ubuntu@VM-0-4-ubuntu:/www/wwwroot/119.29.113.68$ cd zoey ubuntu@VM-0-4-ubuntu:/www/wwwroot/119.29.113.68/zoey$ ls apache-tomcat-9.0.46.tar.gz jdk-16.0.1_linux-x64_bin.tar.gz ubuntu@VM-0-4-ubuntu:/www/wwwroot/119.29.113.68/zoey$ sudo su root@VM-0-4-ubuntu:/www/wwwroot/119.29.113.68/zoey# docker build -f dockerfile -t dirtomcat . Sending build context to Docker daemon 189.8MB Step 1/14 : FROM centos latest: Pulling from library/centos 7a0437f04f83: Pull complete Digest: sha256:5528e8b1b1719d34604c87e11dcd1c0a20bedf46e83b5632cdeac91b8c04efc1 Status: Downloaded newer image for centos:latest ---> 300e315adb2f Step 2/14 : MAINTAINER zoey<2793988587@qq.com> ---> Running in 5f8749b486a2 Removing intermediate container 5f8749b486a2 ---> 9c5366673009 Step 3/14 : ADD jdk-16.0.1_linux-x64_bin.tar.gz /usr/local/ ---> 2adfb8504ea3 Step 4/14 : ADD apache-tomcat-9.0.46.tar.gz /usr/local/ ---> 04d1ba955a9c Step 5/14 : RUN yum -y install vim ---> Running in edd1ed14aa4c CentOS Linux 8 - AppStream 6.7 MB/s | 7.4 MB 00:01 CentOS Linux 8 - BaseOS 2.4 MB/s | 2.6 MB 00:01 CentOS Linux 8 - Extras 3.5 kB/s | 9.6 kB 00:02 Dependencies resolved. ================================================================================ Package Arch Version Repository Size ================================================================================ Installing: vim-enhanced x86_64 2:8.0.1763-15.el8 appstream 1.4 M Installing dependencies: gpm-libs x86_64 1.20.7-17.el8 appstream 39 k vim-common x86_64 2:8.0.1763-15.el8 appstream 6.3 M vim-filesystem noarch 2:8.0.1763-15.el8 appstream 48 k which x86_64 2.21-12.el8 baseos 49 k Transaction Summary ================================================================================ Install 5 Packages Total download size: 7.8 M Installed size: 30 M Downloading Packages: (1/5): gpm-libs-1.20.7-17.el8.x86_64.rpm 290 kB/s | 39 kB 00:00 (2/5): vim-filesystem-8.0.1763-15.el8.noarch.rp 525 kB/s | 48 kB 00:00 (3/5): vim-enhanced-8.0.1763-15.el8.x86_64.rpm 3.5 MB/s | 1.4 MB 00:00 (4/5): which-2.21-12.el8.x86_64.rpm 264 kB/s | 49 kB 00:00 (5/5): vim-common-8.0.1763-15.el8.x86_64.rpm 11 MB/s | 6.3 MB 00:00 -------------------------------------------------------------------------------- Total 3.4 MB/s | 7.8 MB 00:02 warning: /var/cache/dnf/appstream-02e86d1c976ab532/packages/gpm-libs-1.20.7-17.el8.x86_64.rpm: Header V3 RSA/SHA256 Signature, key ID 8483c65d: NOKEY CentOS Linux 8 - AppStream 1.6 MB/s | 1.6 kB 00:00 Importing GPG key 0x8483C65D: Userid : "CentOS (CentOS Official Signing Key) <security@centos.org>" Fingerprint: 99DB 70FA E1D7 CE22 7FB6 4882 05B5 55B3 8483 C65D From : /etc/pki/rpm-gpg/RPM-GPG-KEY-centosofficial Key imported successfully Running transaction check Transaction check succeeded. Running transaction test Transaction test succeeded. Running transaction Preparing : 1/1 Installing : which-2.21-12.el8.x86_64 1/5 Installing : vim-filesystem-2:8.0.1763-15.el8.noarch 2/5 Installing : vim-common-2:8.0.1763-15.el8.x86_64 3/5 Installing : gpm-libs-1.20.7-17.el8.x86_64 4/5 Running scriptlet: gpm-libs-1.20.7-17.el8.x86_64 4/5 Installing : vim-enhanced-2:8.0.1763-15.el8.x86_64 5/5 Running scriptlet: vim-enhanced-2:8.0.1763-15.el8.x86_64 5/5 Running scriptlet: vim-common-2:8.0.1763-15.el8.x86_64 5/5 Verifying : gpm-libs-1.20.7-17.el8.x86_64 1/5 Verifying : vim-common-2:8.0.1763-15.el8.x86_64 2/5 Verifying : vim-enhanced-2:8.0.1763-15.el8.x86_64 3/5 Verifying : vim-filesystem-2:8.0.1763-15.el8.noarch 4/5 Verifying : which-2.21-12.el8.x86_64 5/5 Installed: gpm-libs-1.20.7-17.el8.x86_64 vim-common-2:8.0.1763-15.el8.x86_64 vim-enhanced-2:8.0.1763-15.el8.x86_64 vim-filesystem-2:8.0.1763-15.el8.noarch which-2.21-12.el8.x86_64 Complete! Removing intermediate container edd1ed14aa4c ---> b2008753cdeb Step 6/14 : ENV MYPATH /usr/local ---> Running in 8edf1c3f2391 Removing intermediate container 8edf1c3f2391 ---> 8b9f518da209 Step 7/14 : WORKDIR $MYPATH ---> Running in 7855e6ce4068 Removing intermediate container 7855e6ce4068 ---> 305c248d735f Step 8/14 : ENV JAVA_HOME /usr/local/jdk-16.0.1 ---> Running in 55f5e26eebc3 Removing intermediate container 55f5e26eebc3 ---> 700c77fdc0e8 Step 9/14 : ENV CLASSPATH $JAVA_HOME/lib/dt.jar:$JAVA_HOME/lib/tools.jar ---> Running in 5f672b424183 Removing intermediate container 5f672b424183 ---> a44c5f5a9cab Step 10/14 : ENV CATALINA_HOME /usr/local/apache-tomcat-9.0.46 ---> Running in d6ff74d8da44 Removing intermediate container d6ff74d8da44 ---> 30e1666da899 Step 11/14 : ENV CATALINA_BASH /usr/local/apache-tomcat-9.0.46 ---> Running in 8fae078a92ca Removing intermediate container 8fae078a92ca ---> 41a0cebbeb82 Step 12/14 : ENV PATH $PATH:$JAVA_HOME/bin:$CATALINA_HOME/lib:$CATALINA_HOME/bin ---> Running in b2dbb1759db0 Removing intermediate container b2dbb1759db0 ---> c3afa1ec9016 Step 13/14 : EXPOSE 8080 ---> Running in c26b3de58924 Removing intermediate container c26b3de58924 ---> 3770d2b9551d Step 14/14 : CMD /usr/local/apache-tomcat-9.0.46/bin/startup.sh && tail -f /usr/local/apache-tomcat-9.0.46/bin/logs/catalina.out ---> Running in ca0365db76f3 Removing intermediate container ca0365db76f3 ---> ea2f74a422a6 Successfully built ea2f74a422a6 Successfully tagged dirtomcat:latest root@VM-0-4-ubuntu:/www/wwwroot/119.29.113.68/zoey# root@VM-0-4-ubuntu:/www/wwwroot/119.29.113.68/zoey# docker run -d -p 9090:8080 --name zoeytomcat -v /www/wwwroot/119.29.113.68/zoey/tomcat/test:/usr/local/apache-tomcat-9.0.46/webapps/test -v //www/wwwroot/119.29.113.68/zoey/tomcat/tomcatlogs/:/usr/local/apache-tomcat-9.0.46/logs ea2f 23537e15079a165788b472664d9dadedf917ba34000277d258a9d29cf3442c6b root@VM-0-4-ubuntu:/www/wwwroot/119.29.113.68/zoey#
这里遇到一个问题容器进不去
1 2 3 4 5 6 7 8 9 10 11 12 13 14 15 16 17 18 19 20 21 22 23 24 25 26 root@VM-0-4-ubuntu:/www/wwwroot/119.29.113.68/zoey# docker exec -it 466 /bin/bash Error response from daemon: Container 466295c9cd406a167683945657b327cf730d000ad10108f9a65e24cd623709f1 is not running root@VM-0-4-ubuntu:/www/wwwroot/119.29.113.68/zoey# docker restart 466 && docker exec -it 466 /bin/bash 466 Error response from daemon: Container 466295c9cd406a167683945657b327cf730d000ad10108f9a65e24cd623709f1 is not running root@VM-0-4-ubuntu:/www/wwwroot/119.29.113.68/zoey# 连接断开 root@VM-0-4-ubuntu:/www/wwwroot/119.29.113.68/zoey# docker images REPOSITORY TAG IMAGE ID CREATED SIZE dirtomcat latest ea2f74a422a6 11 minutes ago 597MB root@VM-0-4-ubuntu:/www/wwwroot/119.29.113.68/zoey# docker run -it ea2 Using CATALINA_BASE: /usr/local/apache-tomcat-9.0.46 Using CATALINA_HOME: /usr/local/apache-tomcat-9.0.46 Using CATALINA_TMPDIR: /usr/local/apache-tomcat-9.0.46/temp Using JRE_HOME: /usr/local/jdk-16.0.1 Using CLASSPATH: /usr/local/apache-tomcat-9.0.46/bin/bootstrap.jar:/usr/local/apache-tomcat-9.0.46/bin/tomcat-juli.jar Using CATALINA_OPTS: Tomcat started. tail: cannot open '/usr/local/apache-tomcat-9.0.46/bin/logs/catalina.out' for reading: No such file or directory tail: no files remaining
修改catalina.out后正常。
1 2 3 4 5 6 7 8 9 10 11 12 13 14 15 16 17 18 19 20 21 22 23 24 25 26 27 28 29 30 31 32 ubuntu@VM-0-4-ubuntu:/www/wwwroot/119.29.113.68/zoey$ sudo su root@VM-0-4-ubuntu:/www/wwwroot/119.29.113.68/zoey# docker build -f dockerfile -t dirtomcat . Sending build context to Docker daemon 189.8MB Step 1/14 : FROM centos ---> 300e315adb2f Step 14/14 : CMD /usr/local/apache-tomcat-9.0.46/bin/startup.sh && tail -F /usr/local/apache-tomcat-9.0.46/bin/logs/catalina.out ---> Running in f1b87a4b7780 Removing intermediate container f1b87a4b7780 ---> 55099e41a824 Successfully built 55099e41a824 Successfully tagged dirtomcat:latest root@VM-0-4-ubuntu:/www/wwwroot/119.29.113.68/zoey# docker run -d -p 9090:8080 --name zuo -v /www/wwwroot/119.29.113.68/zoey/tomcat/test:/usr/local/apache-tomcat-9.0.46/webapps/test -v /www/wwwroot/119.29.113.68/zoey/tomcat/tomcatlogs/:/usr/local/apache-tomcat-9.0.46/logs 550 5db8ec585d7b794882ec33456680fc88b6edec4a87d580a92ec044442630433f root@VM-0-4-ubuntu:/www/wwwroot/119.29.113.68/zoey# docker exec -it 5db /bin/bash [root@5db8ec585d7b local]# pwd /usr/local [root@5db8ec585d7b local]# ls -l total 52 drwxr-xr-x 1 root root 4096 Jun 8 07:20 apache-tomcat-9.0.46 drwxr-xr-x 2 root root 4096 Nov 3 2020 bin [root@5db8ec585d7b local]# cd apache-tomcat-9.0.46/ [root@5db8ec585d7b apache-tomcat-9.0.46]# ls -l total 148 -rw-r----- 1 root root 18949 May 8 17:35 BUILDING.txt -rw-r----- 1 root root 5644 May 8 17:35 CONTRIBUTING.md [root@5db8ec585d7b apache-tomcat-9.0.46]#
1 2 3 4 5 6 7 <?xml version="1.0" encoding="ISO-8859-1"?> - <note > <to > Tove</to > <from > Jani</from > <heading > Reminder</heading > <body > Don't forget me this weekend!</body > </note >
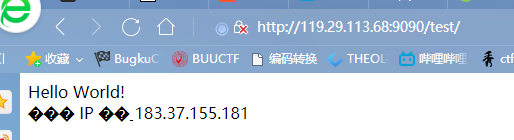
1 2 3 4 5 6 7 8 9 10 11 12 13 14 15 <%@ page language="java" contentType="text/html; charset=UTF-8" pageEncoding="UTF-8" %> <!DOCTYPE html> <html> <head> <meta charset="utf-8" > <title>菜鸟教程(runoob.com)</title> </head> <body> Hello World!<br/> <% out.println("你的 IP 地址 " + request.getRemoteAddr()); %> </body> </html>
发布自己的镜像 https://hub.docker.com/ 注册账号
登录
提交镜像
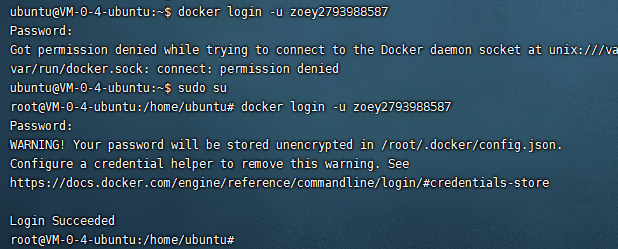
1 2 3 4 5 6 7 8 9 10 11 12 13 14 15 16 17 18 19 20 21 22 23 24 25 26 27 28 29 30 31 32 33 34 35 36 37 38 39 40 41 42 43 44 45 46 47 48 49 50 51 52 53 54 55 56 57 58 59 60 61 62 63 64 65 66 67 68 69 70 71 root@VM-0-4-ubuntu:/home/ubuntu# docker login -u zoey2793988587 Password: WARNING! Your password will be stored unencrypted in /root/.docker/config.json. Configure a credential helper to remove this warning. See https://docs.docker.com/engine/reference/commandline/login/#credentials-store Login Succeeded root@VM-0-4-ubuntu:/home/ubuntu# docker images REPOSITORY TAG IMAGE ID CREATED SIZE dirtomcat latest 55099e41a824 22 hours ago 597MB zoeytomcat latest 8b4ee7cc119a 23 hours ago 597MB root@VM-0-4-ubuntu:/home/ubuntu# docker tag 55099 zoey/tomcat:1.0 root@VM-0-4-ubuntu:/home/ubuntu# docker images REPOSITORY TAG IMAGE ID CREATED SIZE dirtomcat latest 55099e41a824 22 hours ago 597MB zoey/tomcat 1.0 55099e41a824 22 hours ago 597MB zoeytomcat latest 8b4ee7cc119a 23 hours ago 597MB root@VM-0-4-ubuntu:/home/ubuntu# docker push zoey/tomcat:1.0 The push refers to repository [docker.io/zoey/tomcat] 62d3452b111a: Preparing 83f2b6cf4db6: Preparing 71d27b7ab261: Preparing 2653d992f4ef: Preparing denied: requested access to the resource is denied root@VM-0-4-ubuntu:/home/ubuntu# docker tag zoey/tomcat:1.0 zoey2793988587/zoeydockerhub:tagname root@VM-0-4-ubuntu:/home/ubuntu# docker push zoey2793988587/zoeydockerhub:tagname The push refers to repository [docker.io/zoey2793988587/zoeydockerhub] 62d3452b111a: Retrying in 1 second 83f2b6cf4db6: Pushing [================> ] 5.327MB/15.92MB 71d27b7ab261: Pushing [> ] 5.543MB/311.3MB 2653d992f4ef: Pushing [=> ] 6.57MB/209.3MB 2653d992f4ef: Pushing [=> ] 7.127MB/209.3MB root@VM-0-4-ubuntu:/home/ubuntu# docker images REPOSITORY TAG IMAGE ID CREATED SIZE dirtomcat latest 55099e41a824 23 hours ago 597MB zoey/tomcat 1.0 55099e41a824 23 hours ago 597MB zoey2793988587/zoeydockerhub tagname 55099e41a824 23 hours ago 597MB root@VM-0-4-ubuntu:/home/ubuntu# docker push zoey2793988587/zoeydockerhub:tagname The push refers to repository [docker.io/zoey2793988587/zoeydockerhub] 62d3452b111a: Pushed 83f2b6cf4db6: Pushing [==================================================>] 16.47MB 71d27b7ab261: Pushing [==================================================>] 311.3MB/311.3MB 2653d992f4ef: Retrying in 1 second error parsing HTTP 408 response body: invalid character '<' looking for beginning of value: "<html><body><h1>408 Request Time-out</h1>\nYour browser didn't send a complete request in time.\n</body></html>\n\n" root@VM-0-4-ubuntu:/home/ubuntu# 连接断开 不可以执行 root@VM-0-4-ubuntu:/home/ubuntu# docker push zoey/tomcat:1.0 The push refers to repository [docker.io/zoey/tomcat] 62d3452b111a: Preparing 83f2b6cf4db6: Preparing 71d27b7ab261: Preparing 2653d992f4ef: Preparing denied: requested access to the resource is denied 可以执行 root@VM-0-4-ubuntu:/home/ubuntu# docker push zoey2793988587/zoeydockerhub:tagname The push refers to repository [docker.io/zoey2793988587/zoeydockerhub] 62d3452b111a: Preparing 83f2b6cf4db6: Pushing [==> ] 700.9kB/15.92MB 71d27b7ab261: Pushing [> ] 539.8kB/311.3MB 2653d992f4ef: Pushing [> ] 1.089MB/209.3MB ^C root@VM-0-4-ubuntu:/home/ubuntu#
Docker网络原理 1 2 3 4 5 6 7 8 9 10 11 12 13 14 15 16 17 18 19 20 21 22 23 24 25 26 27 28 29 30 31 32 33 34 35 36 37 38 39 40 41 42 43 root@VM-0-4-ubuntu:/home/ubuntu# docker rm -f $(docker ps -aq) 62c87d91138f b6b73497438f 229333161e9a 407cc97514ff 19b9bdaefe0b 0642646b93f1 eb3c672d39cc 9d9a92697fe2 307c26aecd7a 602eaa287d4f cf8942dbba6c a56901a8f1fd ffcb8b83d784 f52447e6836b 19430936f262 1039da7dec12 bf66516baacd 70f692a6983b root@VM-0-4-ubuntu:/home/ubuntu# docker rmi -f $(docker images -aq) Untagged: dirtomcat:latest Untagged: zoey/tomcat:1.0 Untagged: zoey2793988587/zoeydockerhub:tagname Deleted: sha256:55099e41a82424b1344497b5a1d232346d075a18b9fe02125154e62ccbc30f39 Untagged: zoeytomcat:latest Deleted: sha256:8b4ee7cc119a6dd8f9da79164cd65d24ff7590196b5e4d5b7551f2f1e81f10ae Deleted: sha256:ea2f74a422a610d8795fb3cc95da721d5a1312ad43589e2d6ec7333bc53d3aab Deleted: sha256:3770d2b9551dfb16175f313d408a14dd147ad0c6f1ff52282512240f09df787c Deleted: sha256:c3afa1ec90166586628588f1a299676201eb003592b28a2501ff0bfe8d445e5d Deleted: sha256:41a0cebbeb829e5c77197b729f14fd2bfdffda93f1809ef518d5d19992d285f8 Deleted: sha256:30e1666da8992314d765b2d9bfb090055ecb9a9e299e2068d0fade70de67e151 Deleted: sha256:a44c5f5a9cabd6eaa866ce4124d6c954fce7401e2375fd0920b56328533ce655 Deleted: sha256:700c77fdc0e82fcfea1257d7def993798c0a493b34a8de2dc851bc34c73f78b6 Deleted: sha256:305c248d735f8439b344f94c7d2974641a2c6adc4e1c509b21c02f06b859f019 Deleted: sha256:8b9f518da2098579267496ee18000a3cd6d5412825f8d381dcf1ef7d3354d26e Deleted: sha256:b2008753cdeb9b2d36b5f65dd6882acfe47137413656204e0826ffa177efe9d0 Deleted: sha256:a8ba1567a8b8819a03e0daf9a3cec0da3470498b195eaf2b304bef0fb526a5b0 Deleted: sha256:04d1ba955a9c8c580e6dcd5e090be2c55b92546266742d38a92dfc0e121c8ab2 ubuntu@VM-0-4-ubuntu:~$ 连接断开
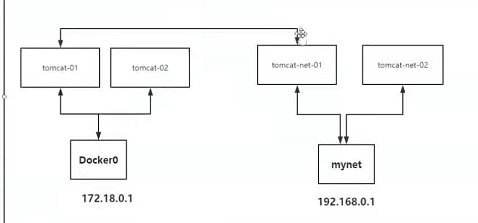
三个网络代表着三种不同的环境。
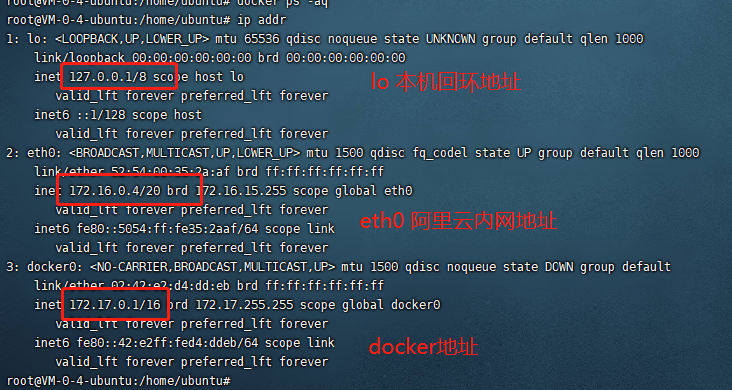
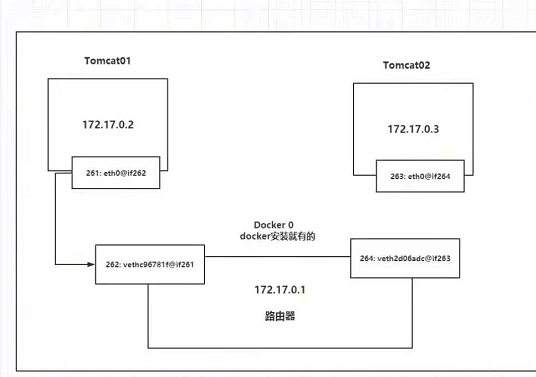
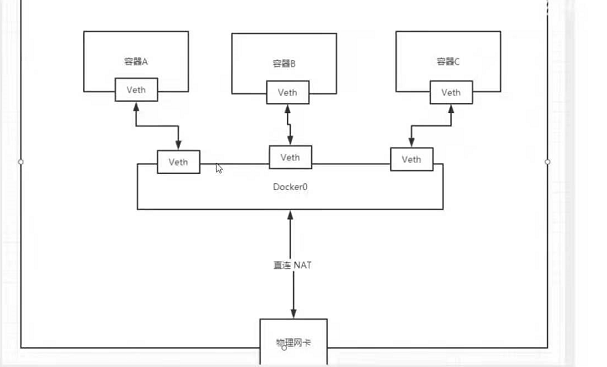
1 2 3 4 5 6 7 8 9 10 11 12 13 14 15 16 17 18 19 20 21 22 23 24 25 26 27 28 29 30 31 32 33 34 35 36 37 38 39 40 41 42 43 44 45 46 47 48 49 50 51 52 53 54 55 56 57 58 59 60 61 62 63 64 65 66 67 68 69 70 71 72 73 74 75 76 77 78 79 80 81 82 83 84 85 86 87 88 89 90 91 92 93 94 95 96 97 98 99 100 101 102 103 104 105 106 107 108 109 root@VM-0-4-ubuntu:/home/ubuntu# docker run -d -P --name tomcat01 tomcat Unable to find image 'tomcat:latest' locally latest: Pulling from library/tomcat d960726af2be: Pull complete e8d62473a22d: Pull complete 8962bc0fad55: Downloading [==============================> ] 6.069MB/9.997MB 65d943ee54c1: Downloading [===========================> ] 28.36MB/51.84MB da20b77f10ac: Download complete 8669a096f083: Download complete e0c0a5e9ce88: Downloading [===========================================> ] 175.9MB/202.9MB f7f46169d747: Waiti root@VM-0-4-ubuntu:/home/ubuntu# docker exec -it tomcat01 ip addr 1: lo: <LOOPBACK,UP,LOWER_UP> mtu 65536 qdisc noqueue state UNKNOWN group default qlen 1000 link/loopback 00:00:00:00:00:00 brd 00:00:00:00:00:00 inet 127.0.0.1/8 scope host lo valid_lft forever preferred_lft forever 198: eth0@if199: <BROADCAST,MULTICAST,UP,LOWER_UP> mtu 1500 qdisc noqueue state UP group default link/ether 02:42:ac:11:00:02 brd ff:ff:ff:ff:ff:ff link-netnsid 0 inet 172.17.0.2/16 brd 172.17.255.255 scope global eth0 valid_lft forever preferred_lft forever root@VM-0-4-ubuntu:/home/ubuntu# # 发现容器启动的时候会得到一个eth0@if1999 ip地址,这个ip地址是docker分配的。 思考,linux能不能ping通容器内部 root@VM-0-4-ubuntu:/home/ubuntu# ping 172.17.0.2 PING 172.17.0.2 (172.17.0.2) 56(84) bytes of data. 64 bytes from 172.17.0.2: icmp_seq=1 ttl=64 time=0.051 ms 64 bytes from 172.17.0.2: icmp_seq=2 ttl=64 time=0.042 ms 64 bytes from 172.17.0.2: icmp_seq=3 ttl=64 time=0.043 ms 64 bytes from 172.17.0.2: icmp_seq=4 ttl=64 time=0.054 ms 64 bytes from 172.17.0.2: icmp_seq=5 ttl=64 time=0.043 ms 64 bytes from 172.17.0.2: icmp_seq=6 ttl=64 time=0.043 ms 64 bytes from 172.17.0.2: icmp_seq=7 ttl=64 time=0.043 ms 64 bytes from 172.17.0.2: icmp_seq=8 ttl=64 time=0.045 ms 64 bytes from 172.17.0.2: icmp_seq=9 ttl=64 time=0.043 ms 64 bytes from 172.17.0.2: icmp_seq=10 ttl=64 time=0.043 ms ^C --- 172.17.0.2 ping statistics --- 10 packets transmitted, 10 received, 0% packet loss, time 9218ms rtt min/avg/max/mdev = 0.042/0.045 原理:我们每启动一个docker容器,docker就会给docker容器分配一个ip,我们只要安装了docker,就会有一个网卡docker0 docker0使用的是桥接模式,使用的技术是evth-pair技术。 root@VM-0-4-ubuntu:/home/ubuntu# ip addr 1: lo: <LOOPBACK,UP,LOWER_UP> mtu 65536 qdisc noqueue state UNKNOWN group default qlen 1000 link/loopback 00:00:00:00:00:00 brd 00:00:00:00:00:00 inet 127.0.0.1/8 scope host lo valid_lft forever preferred_lft forever inet6 ::1/128 scope host valid_lft forever preferred_lft forever 2: eth0: <BROADCAST,MULTICAST,UP,LOWER_UP> mtu 1500 qdisc fq_codel state UP group default qlen 1000 link/ether 52:54:00:35:2a:af brd ff:ff:ff:ff:ff:ff inet 172.16.0.4/20 brd 172.16.15.255 scope global eth0 valid_lft forever preferred_lft forever inet6 fe80::5054:ff:fe35:2aaf/64 scope link valid_lft forever preferred_lft forever 3: docker0: <BROADCAST,MULTICAST,UP,LOWER_UP> mtu 1500 qdisc noqueue state UP group default link/ether 02:42:e2:d4:dd:eb brd ff:ff:ff:ff:ff:ff inet 172.17.0.1/16 brd 172.17.255.255 scope global docker0 valid_lft forever preferred_lft forever inet6 fe80::42:e2ff:fed4:ddeb/64 scope link valid_lft forever preferred_lft forever 199: veth2182e94@if198: <BROADCAST,MULTICAST,UP,LOWER_UP> mtu 1500 qdisc noqueue master docker0 state UP group default link/ether a2:c9:cc:f2:7a:d1 brd ff:ff:ff:ff:ff:ff link-netnsid 0 inet6 fe80::a0c9:ccff:fef2:7ad1/64 scope link valid_lft forever preferred_lft forever root@VM-0-4-ubuntu:/home/ubuntu# docker exec -it tomcat02 ip addr 1: lo: <LOOPBACK,UP,LOWER_UP> mtu 65536 qdisc noqueue state UNKNOWN group default qlen 1000 link/loopback 00:00:00:00:00:00 brd 00:00:00:00:00:00 inet 127.0.0.1/8 scope host lo valid_lft forever preferred_lft forever 200: eth0@if201: <BROADCAST,MULTICAST,UP,LOWER_UP> mtu 1500 qdisc noqueue state UP group default link/ether 02:42:ac:11:00:03 brd ff:ff:ff:ff:ff:ff link-netnsid 0 inet 172.17.0.3/16 brd 172.17.255.255 scope global eth0 valid_lft forever preferred_lft forever root@VM-0-4-ubuntu:/home/ubuntu#ip addr valid_lft forever preferred_lft forever inet6 ::1/128 scope host valid_lft forever preferred_lft forever 2: eth0: <BROADCAST,MULTICAST,UP,LOWER_UP> mtu 1500 qdisc fq_codel state UP group default qlen 1000 link/ether 52:54:00:35:2a:af brd ff:ff:ff:ff:ff:ff inet 172.16.0.4/20 brd 172.16.15.255 scope global eth0 valid_lft forever preferred_lft forever inet6 fe80::5054:ff:fe35:2aaf/64 scope link valid_lft forever preferred_lft forever 3: docker0: <BROADCAST,MULTICAST,UP,LOWER_UP> mtu 1500 qdisc noqueue state UP group default link/ether 02:42:e2:d4:dd:eb brd ff:ff:ff:ff:ff:ff inet 172.17.0.1/16 brd 172.17.255.255 scope global docker0 valid_lft forever preferred_lft forever inet6 fe80::42:e2ff:fed4:ddeb/64 scope link valid_lft forever preferred_lft forever 199: veth2182e94@if198: <BROADCAST,MULTICAST,UP,LOWER_UP> mtu 1500 qdisc noqueue master docker0 state UP group default link/ether a2:c9:cc:f2:7a:d1 brd ff:ff:ff:ff:ff:ff link-netnsid 0 inet6 fe80::a0c9:ccff:fef2:7ad1/64 scope link valid_lft forever preferred_lft forever 201: vethcaeadd7@if200: <BROADCAST,MULTICAST,UP,LOWER_UP> mtu 1500 qdisc noqueue master docker0 state UP group default link/ether 66:ac:d9:4c:6d:db brd ff:ff:ff:ff:ff:ff link-netnsid 1 inet6 fe80::64ac:d9ff:fe4c:6ddb/64 scope link valid_lft forever preferred_lft forever root@VM-0-4-ubuntu:/home/ubuntu# # 我们发现这个容器带来网卡,都是一对一对的 evth-pair就是一对的虚拟设备借口,他们成对出现的,一端连这协议,一端彼此相连 正因为有这个特性,evth-pair 充当一个桥梁,连接各种虚拟网络设备
测试tomcat01与tomcat02能否ping通
1 2 3 4 5 6 7 8 9 10 11 root@VM-0-4-ubuntu:/home/ubuntu# docker exec -it tomcat02 ping 172.17.0.2 PING 172.17.0.2 (172.17.0.2) 56(84) bytes of data. 64 bytes from 172.17.0.2: icmp_seq=1 ttl=64 time=0.076 ms 64 bytes from 172.17.0.2: icmp_seq=2 ttl=64 time=0.054 ms 64 bytes from 172.17.0.2: icmp_seq=3 ttl=64 time=0.051 ms 64 bytes from 172.17.0.2: icmp_seq=4 ttl=64 time=0.056 ms 64 bytes from 172.17.0.2: icmp_seq=5 ttl=64 time=0.063 ms 64 bytes from 172.17.0.2: icmp_seq=6 ttl=64 time=0.051 ms ^C --- 172.17.0.2 ping statistics ---
结论:tomcat01和tomcat02是公用的一个路由器,docker0
使用容器在不指定网络的情况的,都是通过docker0.
Docker中的所有的网络接口都是虚拟的,虚拟的转发效率高(内网传递文件)
只要容器一删除,对应网桥一对就没有了。
–link 高可用
docker每次启动都会重新分配ip,在ip改变的情况下,如何通过名字访问服务,而不通过IP(在两个容器的host加上容器和ip的映射)
1 2 3 4 5 6 7 8 9 10 11 12 13 14 15 16 root@VM-0-4-ubuntu:/home/ubuntu# docker exec -it tomcat01 ping tomcat02 ping: tomcat02: Name or service not known root@VM-0-4-ubuntu:/home/ubuntu# docker run -d -P --name tomcat03 --link tomcat02 tomcat root@VM-0-4-ubuntu:/home/ubuntu# docker exec -it tomcat03 ping tomcat02 PING tomcat02 (172.17.0.3) 56(84) bytes of data. 64 bytes from tomcat02 (172.17.0.3): icmp_seq=1 ttl=64 time=0.060 ms 64 bytes from tomcat02 (172.17.0.3): icmp_seq=2 ttl=64 time=0.056 ms 64 bytes from tomcat02 (172.17.0.3): icmp_seq=3 ttl=64 time=0.055 ms 64 bytes from tomcat02 (172.17.0.3): icmp_seq=4 ttl=64 time=0.054 ms ^C --- tomcat02 ping statistics --- 4 packets transmitted, 4 received, 0% packet loss, time 66ms rtt min/avg/max/mdev = 0.054/0.056/0.060/0.005 ms
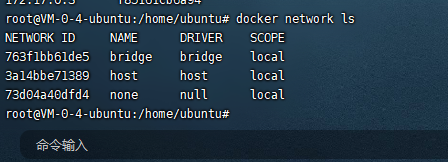
1 2 3 4 5 6 7 8 9 10 11 12 13 14 15 16 17 18 19 20 21 22 23 24 25 26 27 28 29 30 31 32 33 34 35 36 37 38 39 40 41 42 43 44 45 46 47 48 49 50 51 52 53 54 55 56 57 58 59 60 61 62 63 64 65 66 67 68 69 70 71 72 73 74 75 76 77 78 79 80 81 82 83 84 85 86 87 88 89 90 91 root@VM-0-4-ubuntu:/home/ubuntu# docker network ls NETWORK ID NAME DRIVER SCOPE 763f1bb61de5 bridge bridge local 3a14bbe71389 host host local 73d04a40dfd4 none null local root@VM-0-4-ubuntu:/home/ubuntu# docker network inspect 763 [ { "Name": "bridge", "Id": "763f1bb61de5591d49d216568743721ca9a83d97d473543d61f0965971e85123", "Created": "2021-05-08T18:50:17.986102864+08:00", "Scope": "local", "Driver": "bridge", "EnableIPv6": false, "IPAM": { "Driver": "default", "Options": null, "Config": [ { "Subnet": "172.17.0.0/16" } ] }, "Internal": false, "Attachable": false, "Ingress": false, "ConfigFrom": { "Network": "" }, "ConfigOnly": false, "Containers": { "4dee315bb1a7892a4b1103f95eb0a793a4bd3ac1cd66a09b6577edcc0241a518": { "Name": "tomcat01", "EndpointID": "1592c669b4d0440afc8013941cfffd4b6ca2ebaee572dc11403edad52f2f729d", "MacAddress": "02:42:ac:11:00:02", "IPv4Address": "172.17.0.2/16", "IPv6Address": "" }, "c84d5edb19b4c1cf0784e4c6e30ab64dc0b928c4d7984ad2fb0eba85ff79b4a2": { "Name": "tomcat03", "EndpointID": "1426cf39126eedd47e26f21c9ca14c041d0dc18d69560964adaf5d2ca183f004", "MacAddress": "02:42:ac:11:00:04", "IPv4Address": "172.17.0.4/16", "IPv6Address": "" }, "f85161cb6a94371ee761e63486a95e2016fdb328de961d46da82d8b2440c88f0": { "Name": "tomcat02", "EndpointID": "04a8e48d81866a8a8a2beb2daf0b4000357704bf4a7d05c49265be4a4c4e0f4a", "MacAddress": "02:42:ac:11:00:03", "IPv4Address": "172.17.0.3/16", "IPv6Address": "" } }, "Options": { "com.docker.network.bridge.default_bridge": "true", "com.docker.network.bridge.enable_icc": "true", "com.docker.network.bridge.enable_ip_masquerade": "true", "com.docker.network.bridge.host_binding_ipv4": "0.0.0.0", "com.docker.network.bridge.name": "docker0", "com.docker.network.driver.mtu": "1500" }, "Labels": {} } ] root@VM-0-4-ubuntu:/home/ubuntu# root@VM-0-4-ubuntu:/home/ubuntu# docker exec -it tomcat03 cat /etc/hosts 127.0.0.1 localhost ::1 localhost ip6-localhost ip6-loopback fe00::0 ip6-localnet ff00::0 ip6-mcastprefix ff02::1 ip6-allnodes ff02::2 ip6-allrouters 172.17.0.3 tomcat02 f85161cb6a94 172.17.0.4 c84d5edb19b4 root@VM-0-4-ubuntu:/home/ubuntu# root@VM-0-4-ubuntu:/home/ubuntu# docker ps CONTAINER ID IMAGE COMMAND CREATED STATUS PORTS NAMES c84d5edb19b4 tomcat "catalina.sh run" About an hour ago Up About an hour 0.0.0.0:49159->8080/tcp, :::49159->8080/tcp tomcat03 f85161cb6a94 tomcat "catalina.sh run" 3 hours ago Up 3 hours 0.0.0.0:49158->8080/tcp, :::49158->8080/tcp tomcat02 4dee315bb1a7 tomcat "catalina.sh run" 3 hours ago Up 3 hours 0.0.0.0:49157->8080/tcp, :::49157->8080/tcp tomcat01 root@VM-0-4-ubuntu:/home/ubuntu# docker exec -it tomcat02 cat /etc/hosts 127.0.0.1 localhost ::1 localhost ip6-localhost ip6-loopback fe00::0 ip6-localnet ff00::0 ip6-mcastprefix ff02::1 ip6-allnodes ff02::2 ip6-allrouters 172.17.0.3 f85161cb6a94 root@VM-0-4-ubuntu:/home/ubuntu#
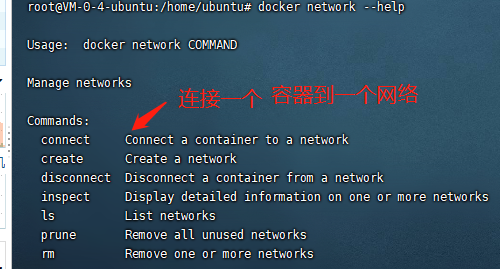
自定义网络 查看所有的docker网络
网络模式
bridge: 桥接 docker(默认)
none:不配置网络
host:和宿主机共享网络
cantainer:容器内网络联通(使用得少)
1 2 3 4 5 6 7 8 测试:我们直接启动的命令 --net bridge,默认参数,也就是docker0 docker run -d -P --name tomcat01 tomcat docker run -d -P --name tomcat01 --net bridge tomcat # docker0的特点,默认,域名不能访问,--link可以打通连接 # 我们可以自定义一个网络
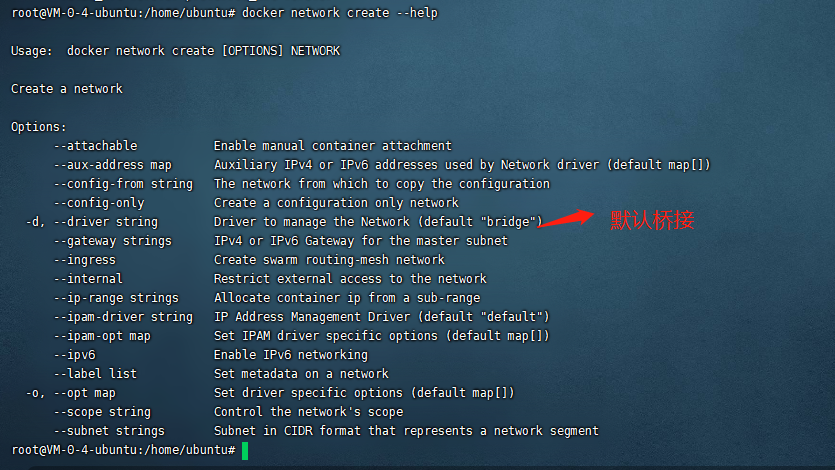
1
2
3
4
5
6
7
8
9
10
root@VM-0-4-ubuntu:/home/ubuntu# docker network create --driver bridge --subnet 192.168.0.0/16 --gateway 192.168.0.1 mynet f92d7cd16b88f9f2ee5678dd29c45c62b6310a8d0bac16328eaa38d5c1efcfbc root@VM-0-4-ubuntu:/home/ubuntu# docker network ls NETWORK ID NAME DRIVER SCOPE 763f1bb61de5 bridge bridge local 3a14bbe71389 host host local f92d7cd16b88 mynet bridge local 73d04a40dfd4 none null local root@VM-0-4-ubuntu:/home/ubuntu#
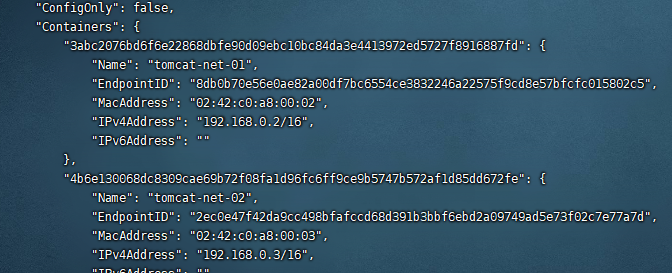
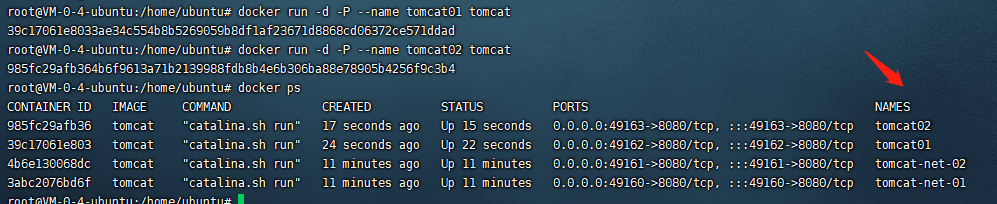
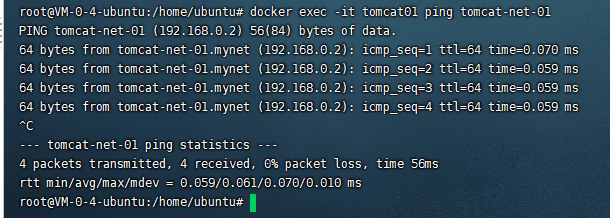
1 2 3 4 5 6 root@VM-0-4-ubuntu:/home/ubuntu# docker run -d -P --name tomcat-net-01 --net mynet tomcat 3abc2076bd6f6e22868dbfe90d09ebc10bc84da3e4413972ed5727f8916887fd root@VM-0-4-ubuntu:/home/ubuntu# docker run -d -P --name tomcat-net-02 --net mynet tomcat 4b6e130068dc8309cae69b72f08fa1d96fc6ff9ce9b5747b572af1d85dd672fe root@VM-0-4-ubuntu:/home/ubuntu# docker network inspect mynet
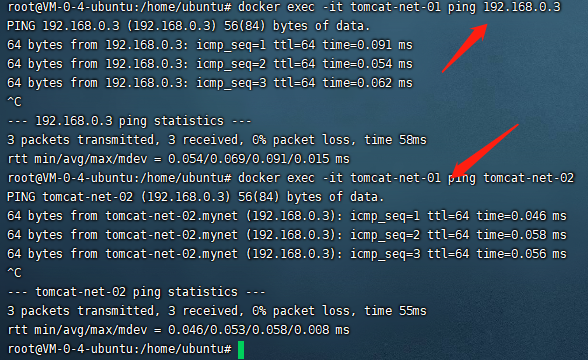
自己创建的网络完善了docker0的缺点,现在不使用–link也可以ping名字。
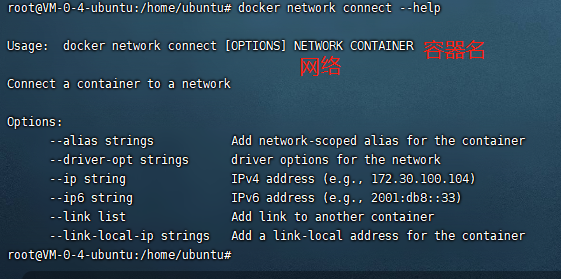
网络连通
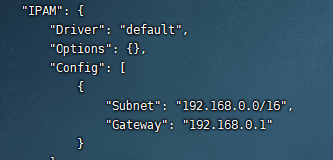
1 2 3 4 5 6 7 8 9 10 11 12 13 14 15 16 17 18 19 20 21 22 23 24 25 26 27 28 29 30 31 32 33 34 35 36 37 38 39 40 41 42 43 44 45 46 47 48 49 50 51 52 53 54 55 56 57 58 # 测试打通tomcat01到mynet root@VM-0-4-ubuntu:/home/ubuntu# docker network connect mynet tomcat01 root@VM-0-4-ubuntu:/home/ubuntu# docker inspect mynet [ { "Name": "mynet", "Id": "f92d7cd16b88f9f2ee5678dd29c45c62b6310a8d0bac16328eaa38d5c1efcfbc", "Created": "2021-06-22T17:02:29.092536016+08:00", "Scope": "local", "Driver": "bridge", "EnableIPv6": false, "IPAM": { "Driver": "default", "Options": {}, "Config": [ { "Subnet": "192.168.0.0/16", "Gateway": "192.168.0.1" } ] }, "Internal": false, "Attachable": false, "Ingress": false, "ConfigFrom": { "Network": "" }, "ConfigOnly": false, "Containers": { "39c17061e8033ae34c554b8b5269059b8df1af23671d8868cd06372ce571ddad": { "Name": "tomcat01", "EndpointID": "c6ef6ac200dcdce1592fec82815710af157e5aad50a9d0dc9bf8b74b57546fd4", "MacAddress": "02:42:c0:a8:00:04", "IPv4Address": "192.168.0.4/16", "IPv6Address": "" }, "3abc2076bd6f6e22868dbfe90d09ebc10bc84da3e4413972ed5727f8916887fd": { "Name": "tomcat-net-01", "EndpointID": "8db0b70e56e0ae82a00df7bc6554ce3832246a22575f9cd8e57bfcfc015802c5", "MacAddress": "02:42:c0:a8:00:02", "IPv4Address": "192.168.0.2/16", "IPv6Address": "" }, "4b6e130068dc8309cae69b72f08fa1d96fc6ff9ce9b5747b572af1d85dd672fe": { "Name": "tomcat-net-02", "EndpointID": "2ec0e47f42da9cc498bfafccd68d391b3bbf6ebd2a09749ad5e73f02c7e77a7d", "MacAddress": "02:42:c0:a8:00:03", "IPv4Address": "192.168.0.3/16", "IPv6Address": "" } }, "Options": {}, "Labels": {} } ] root@VM-0-4-ubuntu:/home/ubuntu# # 连通之后就将tomcat01放在mynet网络下 一个容器,两个ip 公网ip 私网ip
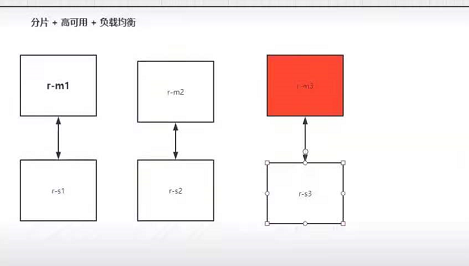
radis集群
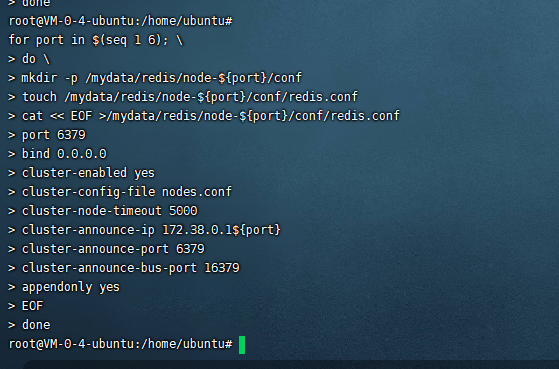
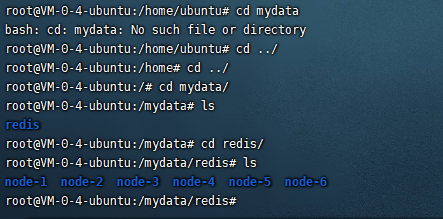
1 2 3 4 5 6 7 8 9 10 11 12 13 14 15 16 for port in $(seq 1 6); \ do \ mkdir -p /mydata/redis/node-${port}/conf touch /mydata/redis/node-${port}/conf/redis.conf cat << EOF >/mydata/redis/node-${port}/conf/redis.conf port 6379 bind 0.0.0.0 cluster-enabled yes cluster-config-file nodes.conf cluster-node-timeout 5000 cluster-announce-ip 172.38.0.1${port} cluster-announce-port 6379 cluster-announce-bus-port 16379 appendonly yes EOF done
1 2 3 4 5 6 7 8 docker run -p 637 root@VM-0-4-ubuntu:/mydata/redis/node-1/conf# docker run -p 1637${port}:16379 --name redis-${port} -v /mydata/redis/node-${port}/data:/data-v /mydata/redis/node-${port}/conf/redis.conf:/etc/redis/redis.conf/-d --net redis -p 172.38.0.1{port} redis:5.0.9-alpine3.11 redis-server /etc/redis/redis.conf docker run -p 1637${port}:16379 --name redis-${port} -v /mydata/redis/node-${port}/data:/data-v /mydata/redis/node-${port}/conf/redis.conf:/etc/redis/redis.conf/-d --net redis -p 172.38.0.1{port} redis:5.0.9-alpine3.11 redis-server /etc/redis/redis.conf
Docker Compose
Define your app’s environment with a Dockerfile so it can be reproduced anywhere.
Dockerfile保证我们的项目在任何地方可以运行。
Define the services that make up your app in docker-compose.yml so they can be run together in an isolated environment.
services什么是服务。 (容器,应用,web,redis,mysql….)
docker-compose.yml这个文件怎么写。
Run docker compose up and the Docker compose command starts and runs your entire app. You can alternatively run docker-compose up using the docker-compose binary.
启动项目。 (一组g)
作用:批量容器编排。
Dockfile 让程序任何地方运行。web服务,redis,mysql,nginx….多个容器。
Compose
1 2 3 4 5 6 7 8 9 10 11 12 13 14 15 16 version: "3.9" services: web: build: . ports: - "5000:5000" volumes: - .:/code - logvolume01:/var/log links: - redis redis: image: redis volumes: logvolume01: {}
dockerfile一次只能启动一个容器,而docker-compose up 一次可以启动多个服务。
安装compose 1,下载
1 2 3 4 sudo curl -L "https://github.com/docker/compose/releases/download/1.29.2/docker-compose-$(uname -s)-$(uname -m)" -o /usr/local/bin/docker-compose Curl -L https://get.daocloud.io/docker/compose/release/download/1.25.5/docker-compose-`uname -s` - `uname -m` > /usr/local/bin/docker-compose
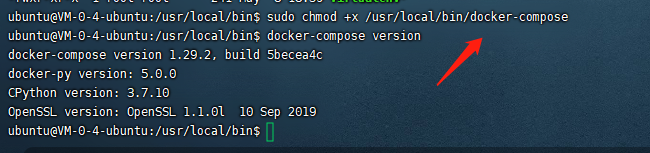
2,授权
1 sudo chmod +x /usr/local/bin/docker-compose
3,安装
1,应用 app.py
2,dockerfile 应用打包为镜像
3,docker-compose
4,启动项目